Native Nodejs Addons
Native Nodejs Addons
This is the first in a series of posts/tutorials on my experience writing a nodejs native addon. This series is aimed at the nodejs developer
who may have expert knowledge of Nodejs/Javascript but has little to no experience extending Nodejs via native addons.
In this series we will explore setting up a development environment(part 1), writing a simple addon using node-addon-api(part 2),
and lastly we will discuss how to design and implement the Api or interface to our native module in Javascript(part 3).
This is, again, a series on my experience as a newcomer to this technology, if I’ve accidently endorsed any bad practices or anti-patterns
please let me know so I may address the offending code.
Part 1: The Development Environment
By the end of this tutorial you should be able to start a new native nodejs project and build, run, and debug with
Qt Creator.
Pre-reqs
The following should be available through your native package manager.
- If you do not already have Qt creator installed, please go install it now.
- Install the latest stable version of nodejs (at the time of writing that is 8.9.3). In this tutorial I am using nvs
- A C/C++ compiler, gnu or clang. If your on arch you can install with
pacman -S clang - CMake
pacman -S cmake - GDB
pacman -S gdb
Project setup
In this step we are going to create a new nodejs project, install required dependencies, and create a minimal CMakeLists.txt file.
- Make your project directory, cd into it and
npm init - Install cmake-js, and node-addon-api
npm i -S cmake-js node-addon-api - Create a CMakeLists.txt file in root of project
touch CMakeLists.txt
In your CMakeLists.txt file add the following:1
2
3
4
5
6
7
8
9
10
11
12
13
14cmake_minimum_required(VERSION 3.2)
project(intro)
file(GLOB SOURCE_FILES
"src/*.h"
"src/*.cc")
add_library(${PROJECT_NAME} SHARED ${SOURCE_FILES})
set_target_properties(${PROJECT_NAME} PROPERTIES
PREFIX ""
SUFFIX ".node")
target_include_directories(${PROJECT_NAME} PRIVATE
${CMAKE_SOURCE_DIR}/node_modules/node-addon-api
${CMAKE_SOURCE_DIR}/node_modules/node-addon-api/src
${CMAKE_JS_INC})
target_link_libraries(${PROJECT_NAME} PRIVATE ${CMAKE_JS_LIB})
For more information on cmake-js, read the docs
The above CMakeLists.txt file is defining a project.
1 | project(intro) |
Linking required header and source files, setting the output to have ‘.node’ suffix, and defining our build as a shared library.
1 | target_include_directories(${PROJECT_NAME} PRIVATE # include header files |
In the CMakeLists.txt file we declared our source files as "src/*.h" and "src/*.cc" this is just telling CMake that all the .cc and .h files in the /src directory are a part of this project. It seems to be convention to have all our native code in the src directory and all our javascript library code in a lib directory.
Our project should appear as such:1
2
3
4
5
6
7project
lib
addon.js
src
addon.cc
package.json
CMakeLists.txt
C++ Development Environment
Qt creator will be our primary IDE for writing and debugging native code.
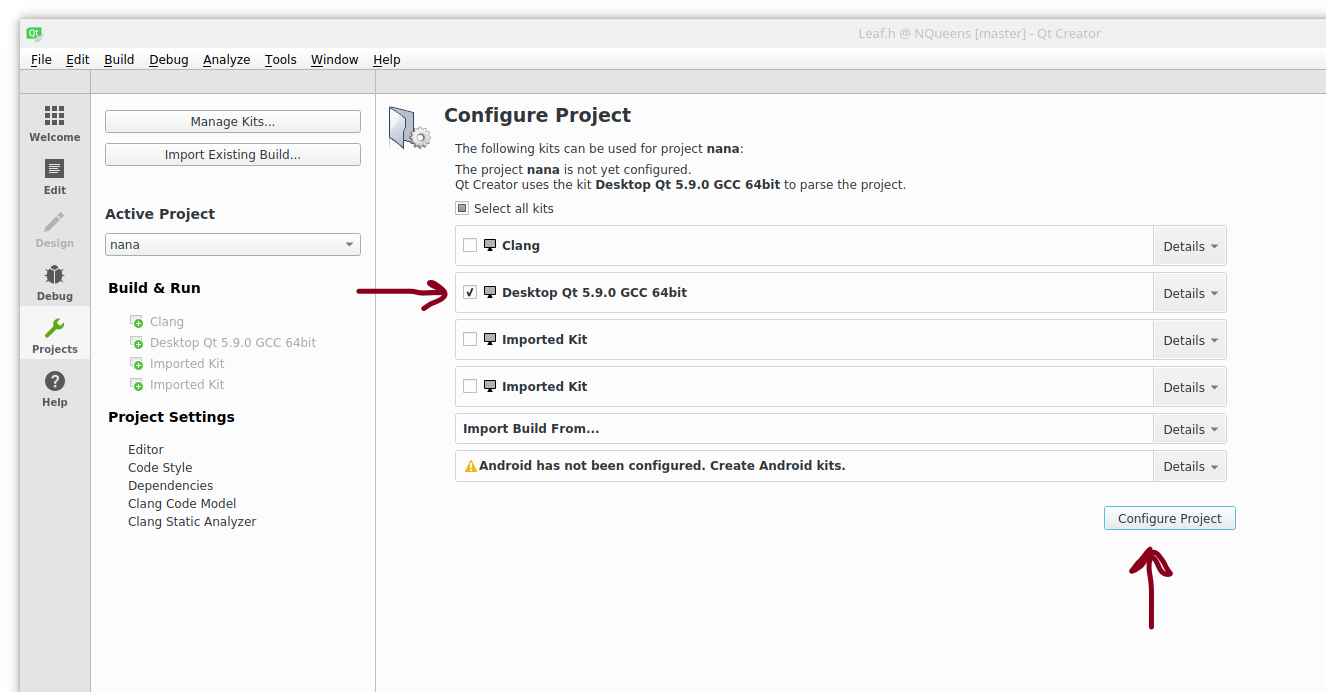
Open Qt and import our project
- press
ctrl-o(open file or project) - find and select the CMakeLists.txt file we just created
This will open the project configuration pane. Select the compiler you would like to use, or just select the qt default, at this time make sure the Debug checkbox is checked under whichever configuration you choose and press theconfigure project button.
We should now be in the Qt editor. This is the place we will do all of our C/C++ editing. This tutorial will not go into writing native addons.
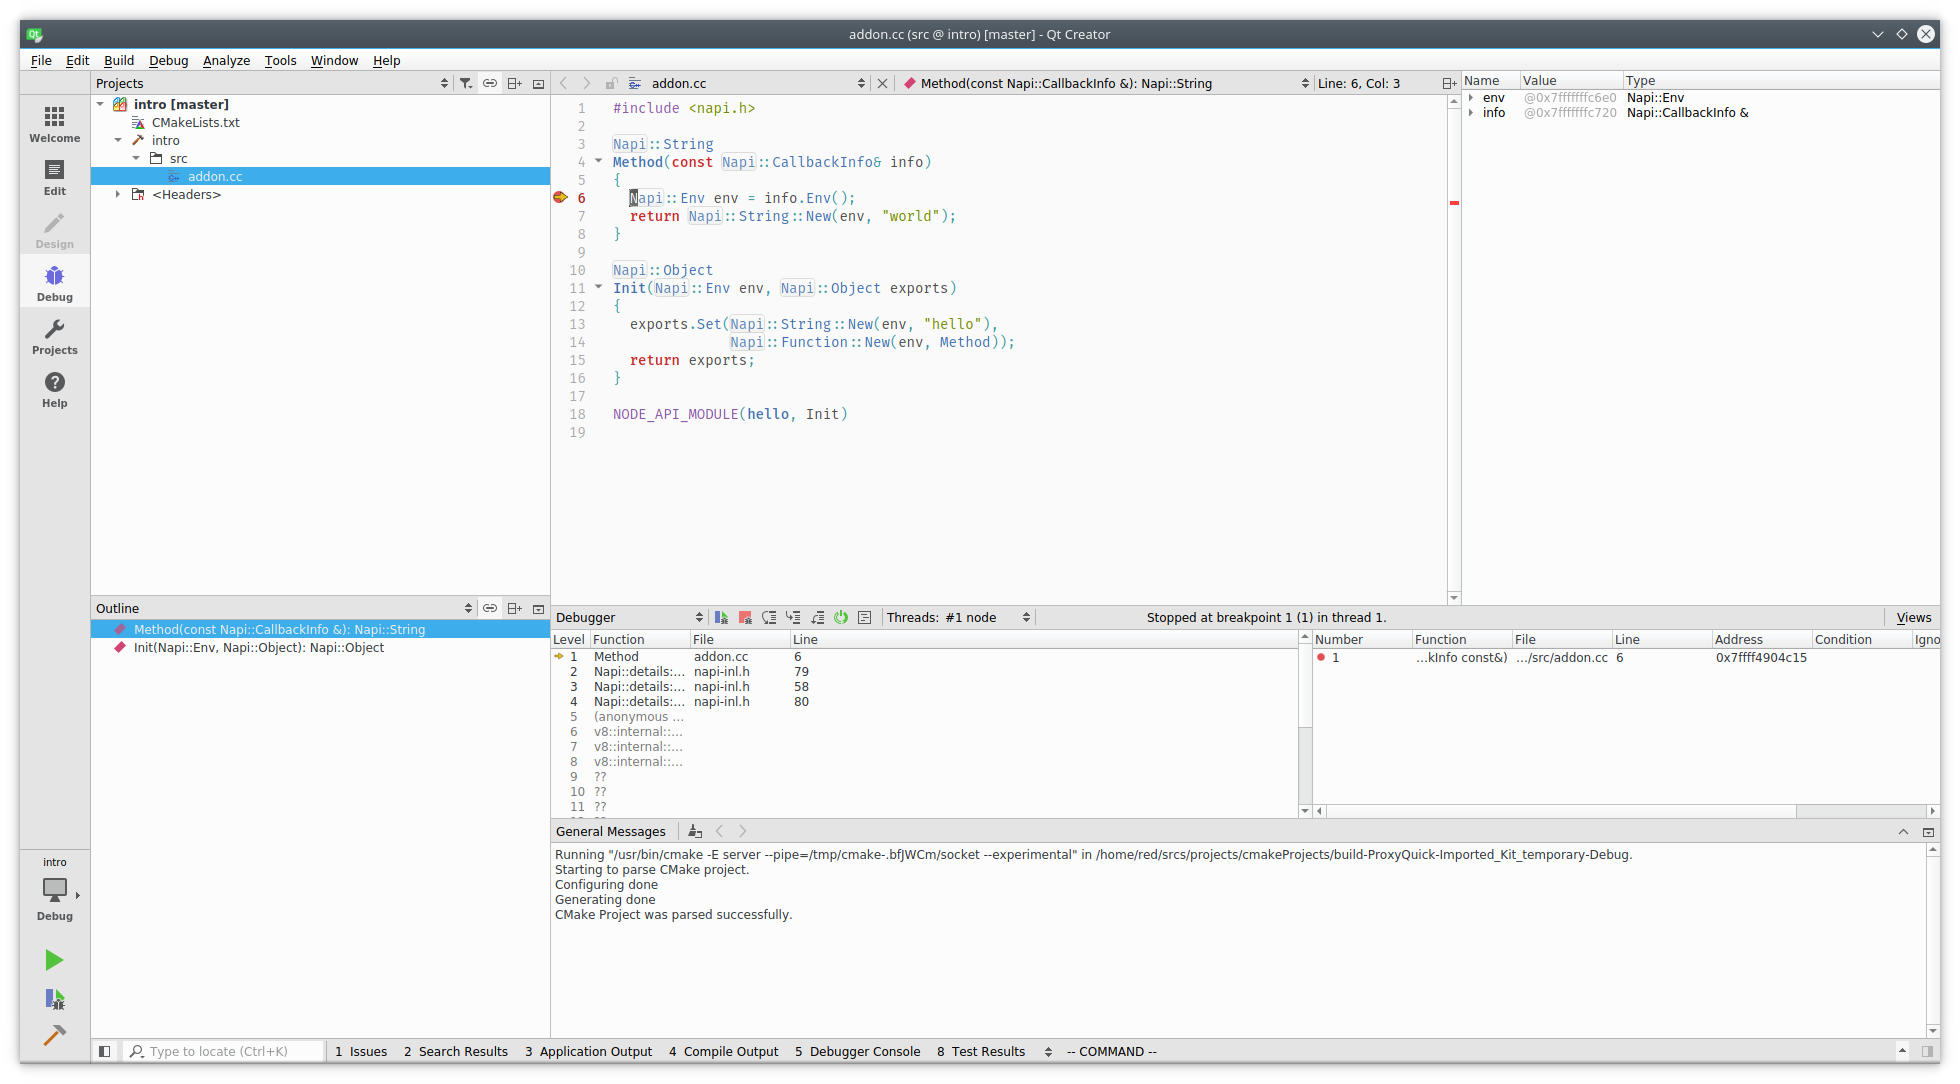
Add the following to addon.cc
1 |
|
and the following to addon.js1
2
3var addon = require('bindings')('hello');
console.log(addon.hello()); // 'world'
Building
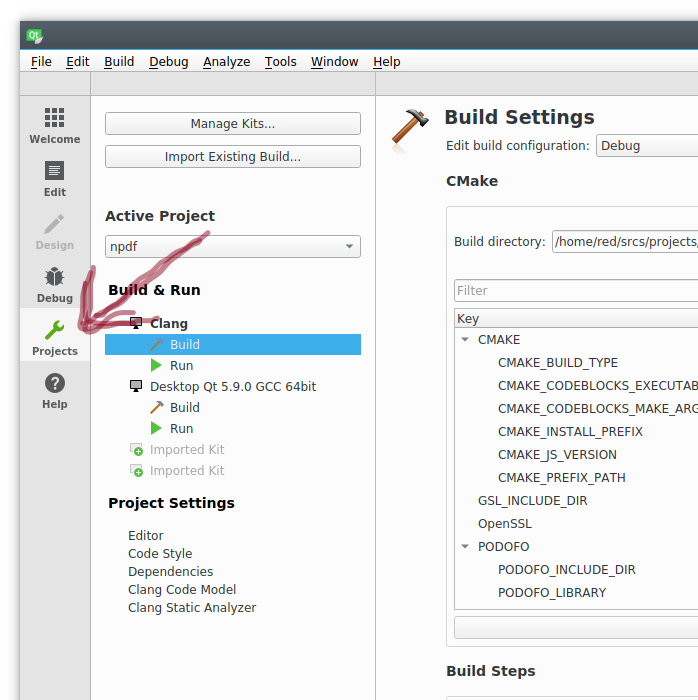
Building our addon is simple with the help of cmake-js. To configure a default build in Qt, select ‘Project mode’ identified by the
wrench icon.
First remove the default build step. This is accomplished by hovering over the build field, a little ‘x’ will appear, click the ‘x’ to remove the item.
Select Add Build Step -> Custom Process Step.
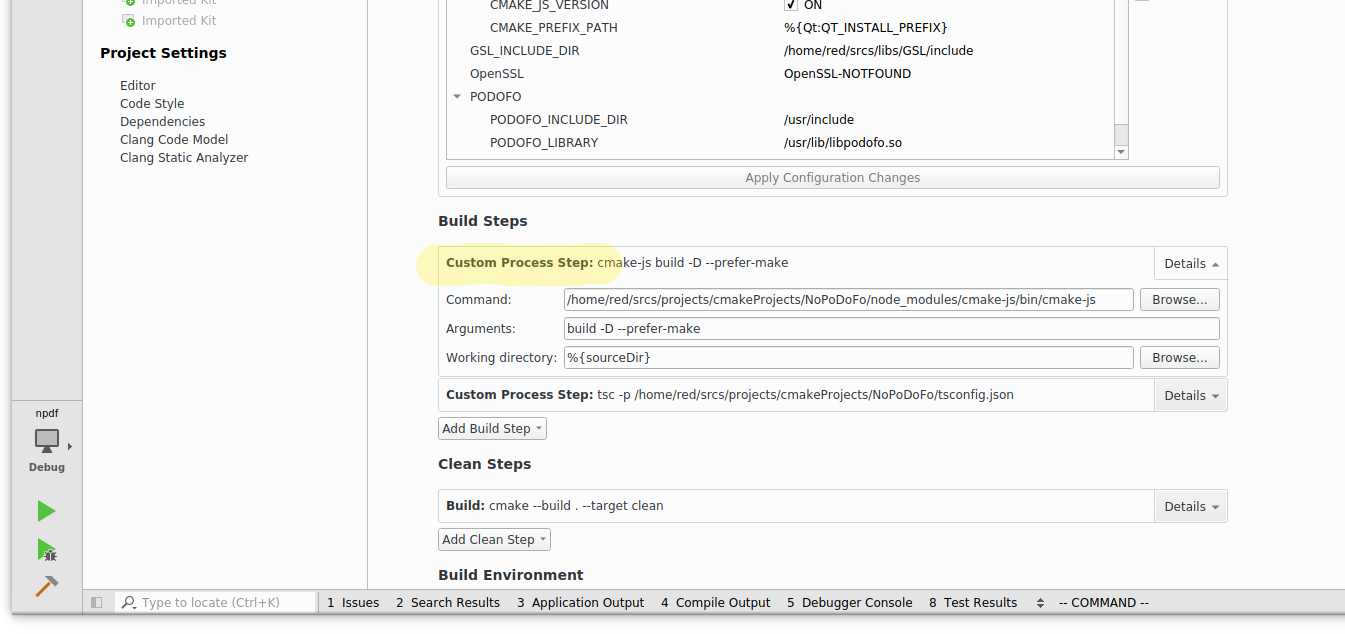
Set the command field to the cmake-js executable, which will be under either your project node modules or global node modules.
Assuming we are using project node modules your path will look something like this: node_modules/cmake-js/bin/cmake-js.
Set the arguments field to build -D. This is just saying that we want to create a debug build. Lastly set the working directory to %{sourceDir}
to set the working directory to our project root.
Running
We’ve completed our build configuration now all that is left is our run configuration.
On the same Project mode view we were in for our build configuration, select the run tab on the left side bar directly under the build tab.
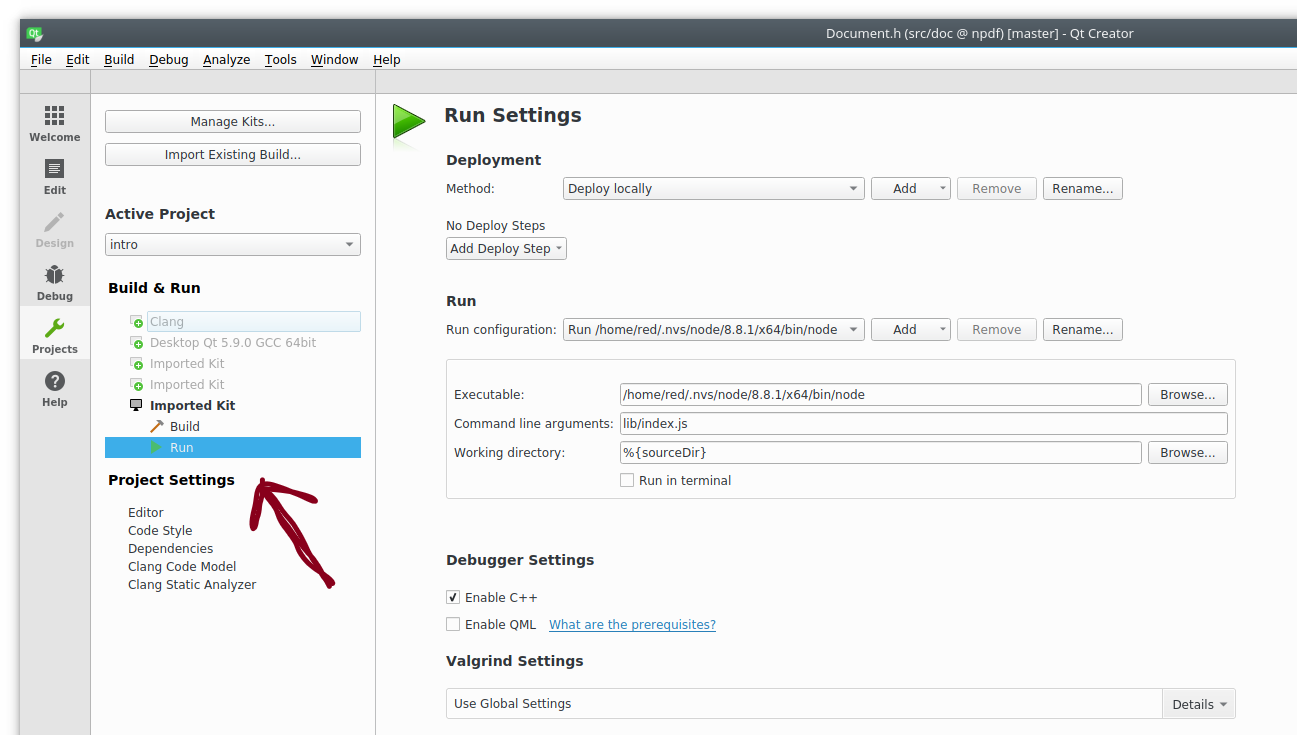
Since we want our project to start from our Javascript code, we will set our executable to our Nodejs installation executable. Here I am using nvs and my executable is located under the .nvs directory.
Next set the command line arguments field to the entry point of your Javascript project/library. To run our addon.js we need to set this field to lib/addon.js. Lastly set the working directory to %{sourceDir}.
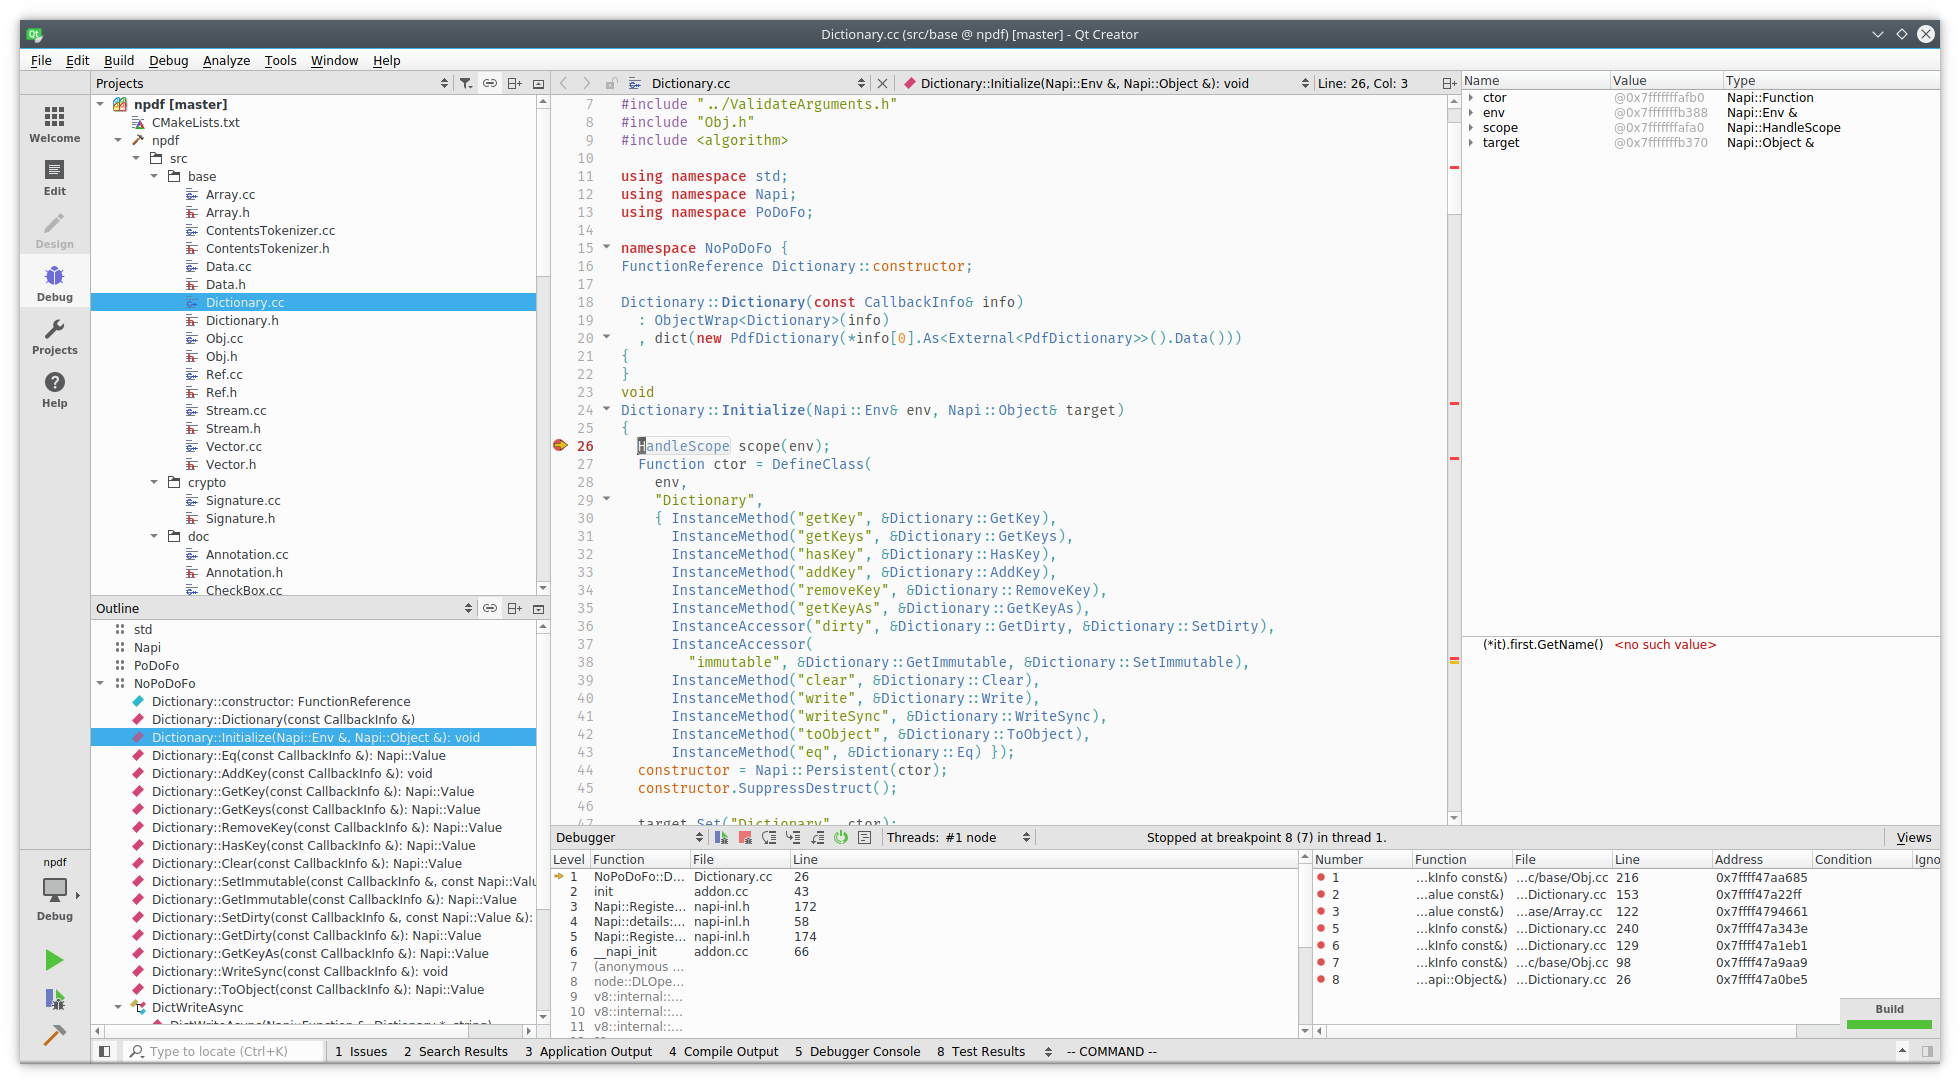
Debugging
To start debugging, set some breakpoints and hit F5.
This will initiate our custom build step, and on completion of our build will call our run configuration on the javascript file
specified in the project mode run settings.
And that is it. I hope you found this helpful.